Key Takeaway
Calculating pressure settings means deciding when your system should turn ON and OFF. You need two values: cut-in pressure (when the system starts) and cut-out pressure (when it stops). The difference between them is called the differential or pressure range. For example, in a water system, a 30/50 psi setting means the pump starts at 30 psi and stops at 50 psi. Choose the cut-in based on the lowest safe pressure for your system, and cut-out based on the highest pressure your equipment can handle. Always refer to the manufacturer’s guide for safe pressure ranges. Adjust the main spring (for both cut-in and cut-out) and the smaller spring (for differential) on the pressure switch. Use a pressure gauge to verify results. Avoid too small a gap, as it causes the system to turn ON and OFF too often. A properly calculated setting keeps your system safe and energy efficient.
Define Your System’s Desired Operating Range
Before selecting or adjusting a pressure switch, you must know your system’s desired pressure range. This includes the normal working pressure, safety limits, and buffer zones for cut-in and cut-out points. For example, if a pump must start at 30 PSI and stop at 50 PSI, the switch should match that range comfortably. Overestimating the range can lead to sluggish response or system inefficiencies. Underestimating it may result in premature wear or even failure. Also consider peak pressure surges and operating environment (temperature, vibration, humidity). Defining the range ensures that your switch operates efficiently, extends equipment life, and avoids triggering errors under fluctuating conditions.
Determine Cut-In and Cut-Out Pressures
Once you know the desired pressure range, the next step is pinpointing the cut-in and cut-out pressures. These are the two critical points where your pressure switch takes action.
Cut-in pressure is the point where the switch turns ON your system. For example, it activates the pump or compressor when pressure drops below a specific threshold.
Cut-out pressure is the OFF point. The system stops running when pressure reaches your desired upper limit.
Let’s go back to our water booster example. You might set the cut-in at 2 bar and the cut-out at 4 bar. When pressure falls to 2 bar, the pump kicks in. When it rises to 4 bar, it shuts off. Simple.
But here’s the catch: never set them too close together. Why? Because that would make your equipment start and stop too frequently. It causes wear and tear. And that leads to expensive maintenance down the line.
The ideal gap between cut-in and cut-out depends on the system. For compressors, it might be 1-2 bar. For high-pressure applications, it might be more.
Also, test your setup. Don’t rely on theory alone. After setting the values, observe the system in action. Make sure everything is responding as expected.
Account for Hysteresis and Safety Margins
Hysteresis is the intentional difference between the switch’s cut-in and cut-out pressures. It prevents rapid cycling. Without it, your switch might turn the pump on and off repeatedly within seconds. That’s a big no.
Think of hysteresis as breathing space. For example, if your cut-in is 2 bar and your cut-out is 4 bar, then the hysteresis is 2 bar. This gap ensures your system doesn’t keep switching unnecessarily.
But wait, there’s more.
You also need to account for safety margins. Never set your cut-out pressure too close to the maximum pressure rating of your pump or pipework. Always leave some buffer.
Let’s say your pump has a maximum pressure limit of 6 bar. Don’t set your cut-out at 6. Set it at 5.5 or even 5. That way, you’re giving your system breathing room.
It’s the same for cut-in. Don’t let the pressure drop too low. It could cause cavitation, air pockets, or simply failure to restart.
Real-life tip? Always check the datasheet of your pressure switch. Many switches already include built-in hysteresis. Knowing this helps you plan your settings more precisely.
Hysteresis + Safety Margin = Peace of mind. That’s the formula.
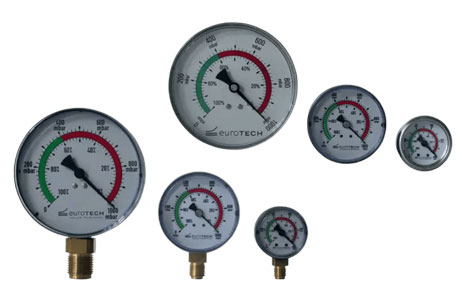
Pressure Unit Conversion Tips (PSI, Bar, MPa)
Here’s a rookie mistake we see all the time: mixing up pressure units.
You might see 58 PSI on one label, 4 bar on another, and 0.4 MPa on a datasheet. Confused? Don’t worry. It’s just a matter of knowing how to convert.
Let’s get you sorted:
1 bar = 14.5 PSI
1 MPa = 10 bar = 145 PSI
So if your system runs at 4 bar, that’s the same as 58 PSI or 0.4 MPa.
Now why does this matter?
Because mismatching units can lead to the wrong switch settings. Imagine setting your cut-out for 4 MPa instead of 4 bar. That’s 10x higher. You could damage everything.
Always double-check what unit your pressure gauge, controller, and switch are using. Standardize them. Stick to one format across your system. It reduces errors.
Use a unit converter app or even a sticky note on the panel with key conversions. It sounds basic, but it saves serious headaches.
And for documentation? Always note the unit. 4 doesn’t mean anything unless you say 4 bar or 4 PSI.
A good engineer never assumes. They measure, convert, and confirm. That’s how you build trust in your system.
Use Manufacturer Charts for Accuracy
Let’s get one thing clear – guessing is not engineering. If your pressure switch came with a chart or datasheet, use it. It’s gold.
Most pressure switch manufacturers provide charts that show:
Minimum and maximum operating pressures
Factory-set hysteresis
Tolerance ranges
Adjustment instructions
These aren’t just suggestions. They’re based on lab testing and real-world simulations.
Let’s say you’re installing a mechanical switch rated for 1-5 bar. The chart might show a default cut-in at 2 bar and cut-out at 4.5 bar. But it also tells you how many turns of the screw adjust that value by 0.1 bar. This info is priceless when you’re tuning a system.
If it’s an electronic switch, you might get even more detail. Some switches allow programming through an app or panel. Charts will show sensor accuracy, time delays, and temperature compensation factors.
Also, charts help you stay within limits. Don’t try to set a switch beyond what the specs allow. It might work for a day. But it won’t last.
Conclusion
Setting your pressure switch accurately isn’t just about performance—it’s about avoiding costly breakdowns. If cut-in and cut-out settings are too close, the system may short cycle, leading to motor damage. If too far apart, it could cause pressure spikes or energy waste. Precision also means accounting for hysteresis and using the correct pressure units (PSI, bar, MPa). Miscalculations can lead to burst pipes, failed seals, or safety risks. Manufacturer charts and conversion tools are your best allies. Never guess the settings—measure, test, and verify. Smart calibration ensures the pressure switch activates at the right time, every time. It’s a small effort that protects your equipment, saves money, and keeps the entire system running smoothly.