Key Takeaway
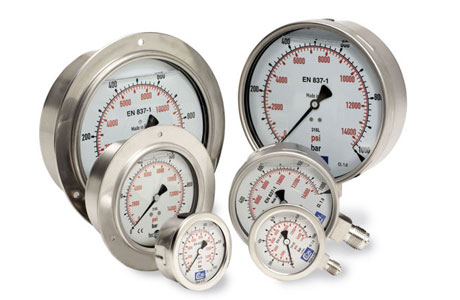
Zero error in pressure gauges occurs when the gauge does not return to zero when there is no applied pressure. This can result from mechanical wear, overpressure, or poor calibration. Zero error leads to incorrect readings and can compromise safety or efficiency. For example, if a gauge starts at +5 psi with no pressure, all subsequent readings will be off by that amount. Zero error is more common in mechanical gauges like Bourdon tubes, which can deform over time. Regular maintenance, calibration, and using gauges within their rated pressure range help reduce the chances of zero error.
Causes: Aging, Shock, or Poor Manufacturing
Pressure gauges can go bad — not because they’re faulty, but because of how they’re handled or made. Common causes of failure include:
Aging: Over time, springs weaken, seals dry, and tubes lose elasticity.
Mechanical Shock: A dropped gauge or water hammer in the line can bend the Bourdon tube.
Manufacturing Defects: Cheap gauges may have weak solder joints, thin tubes, or poorly calibrated dials.
Always choose gauges from reputed manufacturers. Even if they cost a bit more, they offer long-term reliability and certified accuracy.

How to Detect Zero Deviation
Zero deviation is a common and dangerous calibration error — especially when unnoticed. Here’s how to detect it:
Isolate the gauge from the system.
Vent all pressure (confirm with a second gauge or vent valve).
Observe the pointer — it should align with zero.
If it’s off by 1–2 divisions or more, the gauge is reading incorrectly even before any pressure is applied. This affects every reading taken, skewing process data.
To confirm, reconnect the gauge and apply known pressure levels. If the error is consistent throughout, it likely stems from a shifted Bourdon tube or gear wear. Recalibrate or replace the gauge immediately.
How Zero Error Affects System Readings
Zero error means the gauge shows a value even when pressure is zero. This skews every reading thereafter.
For example:
A +0.5 bar error causes a 10% error at 5 bar.
Your system may operate out of spec — without anyone realizing it.
It leads to:
Poor process control
Failed quality tests
Delayed maintenance
Check zero routinely. If the gauge is off, recalibrate or replace it. Don’t let one small offset compromise your entire process integrity.
Adjustment Methods for Zero Error
Zero error can be corrected through:
External zero reset screw: Found in many industrial-grade gauges
Internal pointer repositioning: Requires opening the gauge
Recalibration using master reference gauge: For higher accuracy needs
Steps:
Vent pressure from the system
Ensure the system is fully depressurized
Adjust the zero screw until the pointer aligns
Verify with known pressure values
Some digital gauges offer auto-zeroing functions. For mechanical types, do not force the pointer manually — it may damage the internal gear or linkage system.
Importance of Regular Recalibration
Over time, every pressure gauge drifts. Mechanical wear, environmental conditions, or internal fatigue affect the accuracy. That’s why regular recalibration is vital for reliable performance.
A gauge that was ±1% accurate when installed may drift to ±3% after months of heavy use. Without recalibration, you’re operating blind — trusting numbers that no longer reflect reality.
Benefits of recalibration:
Ensures measurement accuracy
Maintains regulatory compliance (ISO, FDA, etc.)
Prevents safety incidents caused by incorrect pressure readings
Identifies failing or worn-out gauges early
How often should you recalibrate? That depends on:
Usage frequency
Operating conditions (vibration, temp, pressure cycles)
Safety criticality
Manufacturer recommendations
General rule:
Critical systems → every 3–6 months
Non-critical → annually
Always document calibration dates and use stickers to label the next due date. For digital gauges, use built-in calibration history or digital logs.
Recalibration isn’t a cost — it’s an investment in safety, efficiency, and trust.
Conclusion
A slight zero error—where the gauge doesn’t read zero at no pressure—might seem harmless, but in reality, it can distort your entire process monitoring. That 2–3 PSI off could make the difference between maintaining safe pressure and exceeding design limits. Zero error often results from mechanical stress, vibration, or aging components. Over time, it compounds—misguiding operators and triggering false diagnostics. Regular zero checks and recalibration are essential, especially in safety-critical systems. Many analog gauges have a manual zero adjust feature; others may require replacement. The lesson is clear: don’t ignore small inconsistencies. Zero error, though small on paper, could cause big failures on the shop floor.
